


WordPress is one of the best CMSs out there — if not the best (but of course, I’m biased because I’m a WordPress fanatic). It has loads of handy features that make site administration a breeze. WordPress is a publishing platform with a comment system, a GUI for creating, editing and managing posts and pages, handy built-in tools like the "Export" feature to back up your content, user roles and permissions, and more.
But how much of these features do we really use? Though already simple and user-friendly by default, we might want to customize the WordPress Admin interface to make it even simpler and more manageable for our clients, our co-authors, and ourselves.
Why Customize the WordPress Admin Interface?
Lately, WordPress has reached phenomenally high usage rates. There are over 25 million publishers[1] who use WordPress, making it a popular publishing platform. This means that its use has been extended outside of just a blogging platform (although it was certainly built for bloggers at the start) to other types of sites such as portfolios, business sites, image galleries, and even e-commerce sites.
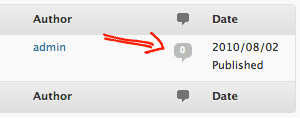
Here is the problem, though. A robust publishing platform like WordPress has way more features than a regular user would ever need. Take the "Comments" panel for instance: Not everyone is going to need all the moderation privileges it has. Some sites might not even need commenting capabilities on their content. For example, a static informational site that doesn’t have a blog section might not want people to be able to comment on static pages like their About and Contact Us page.
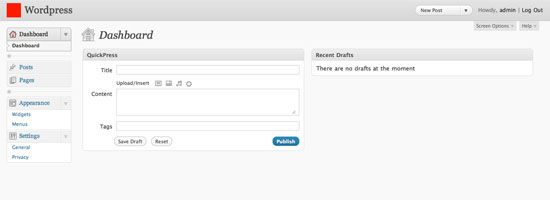
The following image shows the default WordPress Dashboard — the first page you’ll see when you log into the Admin area. For tech-savvy folks and power users, it’s great. But imagine a person (such as a paying client of yours) who doesn’t need half of the things they see in this screen. All they want to do is publish a post. Maybe edit it if they make a mistake. That’s it. Nothing else.
The Solution
Luckily, WordPress has a solution. A good one. A completely modular and reversible one, in case you want to quickly revert back to the way things were.
The solution is called Hooks, also known as "Filters" and "Actions". These guys allow us to "hook" into the WordPress core without modifying its files so that we can safely make changes without compromising the integrity of our installation.
We are going to use WordPress’s different actions and some of the available filters to remove features we do not need. We will also make some basic customization changes to brand our WordPress Admin area for our clients.
The snippets we will be using are mostly from my site, WP Snippets, a searchable repository of WordPress snippets (check it out when you have the time).
WordPress’s functions.php
Let’s get started. The first thing you need to do is open up
functions.php in your theme’s directory. If you don’t have a functions.php file, then just create one using your favorite text editor.functions.php is the file where we will put all our code in. WordPress automatically checks this file, allowing you to customize just about everything before it’s rendered on the screen.Sounds fuzzy? Here’s how it works. Try out the following code. Don’t worry; it will only affect the Admin area — so your site visitors won’t see it. However, I do want to advise you to experiment offline by installing WordPress on your computer (it’s easier than you think).
<php
function testing() {
  echo 'Hello World!';
}

add_action( 'admin_head', 'testing' );
?>

Explanation
The code should print ‘Hello World!’ inside the
<head> tags in the Admin panel, which isn’t valid HTML code and therefore is printed out at the top of the web page.The
testing() function is our code that we want to run. To hook into WordPress core, we use the add_action() function. In this situation, we pass in two parameters. The first parameter is the name of the action you want to hook into ('admin_head'). The second parameter is the name of the function you want to run ('testing').After you try this code snippet out, be sure to remove this code from your
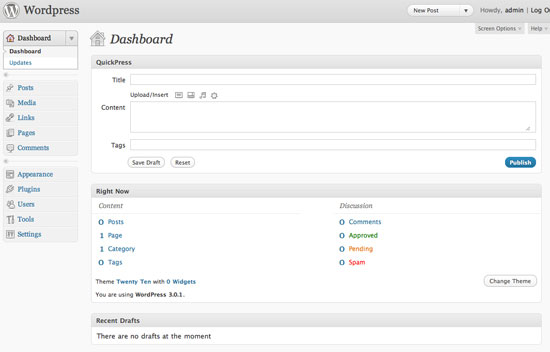
functions.php file (we’re done with it).Disable Dashboard Widgets
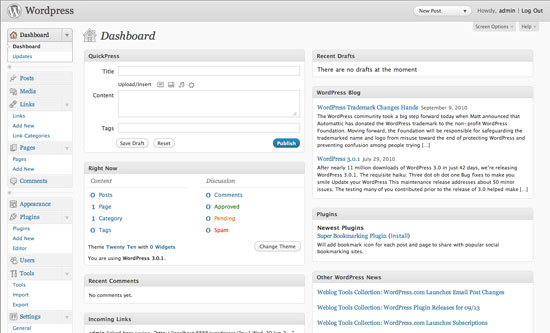
The first thing people will see when logging into the Admin area is the Dashboard. There, you’ll find widgets like "WordPress Blog," "Other WordPress News," and "Incoming Links". Not very interesting for the average user.
We will be using the
wp_dashboard_setup action to remove them. In the function we want to execute, we will use the unset() function to remove the Dashboard widgets we don’t want to display. Then all we need to do is call add_action() using 'wp_dashboard_setup' as the first parameter as well as our function, named remove_dashboard_widgets, as the second parameter.function remove_dashboard_widgets(){
global$wp_meta_boxes;
unset($wp_meta_boxes['dashboard']['normal']['core']['dashboard_plugins']);
unset($wp_meta_boxes['dashboard']['normal']['core']['dashboard_recent_comments']);
unset($wp_meta_boxes['dashboard']['side']['core']['dashboard_primary']);
unset($wp_meta_boxes['dashboard']['normal']['core']['dashboard_incoming_links']);
unset($wp_meta_boxes['dashboard']['normal']['core']['dashboard_right_now']);
unset($wp_meta_boxes['dashboard']['side']['core']['dashboard_secondary']);
}
add_action('wp_dashboard_setup', 'remove_dashboard_widgets');
Check out the WordPress docs entry on removing dashboard widgets for more information.
Disable Standard Widgets
WordPress comes with 12 standard widgets. Some of these default widgets include Calender (
WP_Widget_Calendar), Search (WP_Widget_Search) and Recent Comments (WP_Widget_Recent_Comments).
You might want to disable the widgets that aren’t needed for your WordPress installation, again, to simplify and declutter your publishing platform. For example, you might not need the calendar, or maybe you’ve used a third-party search service such as Google Custom Search for your client’s WordPress installation.
For this one, we will be using
widgets_init action. We will name our function simply as remove_some_wp_widgets. In our function, we will use WordPress’s unregister_widget() function using the names of the widgets we don’t want to use as the parameter.Then, like before, we just call
add_action. What you’ll see in this code snippet is a third parameter ('1'). The third parameter is the priority of the action. 10 is the default priority, meaning that if you don’t pass a value for this optional parameter, it will assume the value is 10. The lower the number, the higher the priority. So at 1, this is one of the top priority functions that will be called first no matter what its position is in functions.php.function remove_some_wp_widgets(){
unregister_widget('WP_Widget_Calendar');
unregister_widget('WP_Widget_Search');
unregister_widget('WP_Widget_Recent_Comments');
}
add_action('widgets_init',remove_some_wp_widgets', 1);
Learn more about the Widgets API to see other cool stuff you can do with it.
Removing Menu Items
You might want to remove menu items in the Admin panel to simplify the interface.
This is how you disable top-level menu items such as "Posts," "Media," "Appearance," and "Tools":
function remove_menu_items() {
  global $menu;
  $restricted = array(__('Links'), __('Comments'), __('Media'),
  __('Plugins'), __('Tools'), __('Users'));
  end ($menu);
  while (prev($menu)){
    $value = explode(' ',$menu[key($menu)][0]);
    if(in_array($value[0] != NULL?$value[0]:"" , $restricted)){
      unset($menu[key($menu)]);}
    }
  }

add_action('admin_menu', 'remove_menu_items');
This is how you would remove submenu items under the top-level navigation (for example, the "Theme" link under "Appearance"):
function remove_submenus() {
  global $submenu;
  unset($submenu['index.php'][10]); // Removes 'Updates'.
  unset($submenu['themes.php'][5]); // Removes 'Themes'.
  unset($submenu['options-general.php'][15]); // Removes 'Writing'.
  unset($submenu['options-general.php'][25]); // Removes 'Discussion'.
  unset($submenu['edit.php'][16]); // Removes 'Tags'.
}

add_action('admin_menu', 'remove_submenus');
To find what the submenu names are, just go to wp-admin/menu.php and search for the item you want to disable.
Remove the Editor Submenu Item
The Editor link (a submenu item under "Appearance") is a bit tricky to disable. It doesn’t respond to the
unset() function used above. Thus, if we wanted to remove it from the menu, we’d have to remove the action that displays it.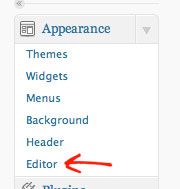
We will use the
remove_action() function which simply removes the action from our theme.function remove_editor_menu() {
remove_action('admin_menu', '_add_themes_utility_last', 101);
}
add_action('_admin_menu', 'remove_editor_menu', 1);
Disable Meta Boxes in the Editing Pages
The "Add New" and "Edit" pages — the GUI for creating and editing posts and pages — is probably the most used feature in the Admin area. This is what you and/or your clients will be most exposed to. It serves us well if we try to clean these pages up by removing things that we do not need.

For example, do you use any Custom fields or do you use the Excerpts field? If not, just remove them from this view.
The following code snippet uses the
remove_meta_box() function. The first parameter is the meta box’s HTML ID attribute you want to remove.To find out the ID, just inspect the source code or use a tool like the Web Developer Toolbar to determine the ID attribute value of the section’s containing
<div>. For example, the Custom Fields’ ID is #postcustom, so the parameter we use is 'postcustom'.
The second parameter refers to the page you want to remove the meta box from (it can be either
'post', 'page', or 'link').We are going to remove the custom field, Trackbacks checkbox (because most of the time, we either enable or disable it in all of our posts), the comments status option, tags (if you don’t tag your posts with keywords, why have this input field?), and so on.
function customize_meta_boxes() {
  /* Removes meta boxes from Posts */
  remove_meta_box('postcustom','post','normal');
  remove_meta_box('trackbacksdiv','post','normal');
  remove_meta_box('commentstatusdiv','post','normal');
  remove_meta_box('commentsdiv','post','normal');
  remove_meta_box('tagsdiv-post_tag','post','normal');
  remove_meta_box('postexcerpt','post','normal');
  /* Removes meta boxes from pages */
  remove_meta_box('postcustom','page','normal');
  remove_meta_box('trackbacksdiv','page','normal');
  remove_meta_box('commentstatusdiv','page','normal');
  remove_meta_box('commentsdiv','page','normal');
}

add_action('admin_init','customize_meta_boxes');
Remove Items from the Post and Page Columns
WordPress’s Admin area often has tables that give you a quick overview of a listing of your content. If you wanted to remove columns from these views, you can.
This time, we will use the
add_filter() WordPress function to add a filter instead of an action. A filter is simply a function that watches out for data being called from the database. When it sees something that we want to remove (or modify), it executes the filter first before rendering the data on the web page.In the example below, we will remove the comments count from the Edit Pages and Edit Posts pages.
function custom_post_columns($defaults) {
  unset($defaults['comments']);
  return $defaults;
}

add_filter('manage_posts_columns', 'custom_post_columns');

function custom_pages_columns($defaults) {
  unset($defaults['comments']);
  return $defaults;
}

add_filter('manage_pages_columns', 'custom_pages_columns');
Customize the Favorites Dropdown
Sitting at the top bar of the Admin area is a dropdown called "favorites" that just lists commonly used Admin tasks such as "New Post," "Comments" (which takes you to the comment moderation page), and so on — for easy access.

If we wanted to remove items in this menu, we can easily do so. (Of course, we can also add stuff here too.) We can do this by adding another filter and unsetting the link, which is contained in a PHP array called
$actions.function custom_favorite_actions($actions) {
unset($actions['edit-comments.php']);
return $actions;
}
add_filter('favorite_actions', 'custom_favorite_actions');
The Final Stretch: Miscellaneous Modifications
Everything we have done so far is to disable stuff we don’t need. Now we’ll modify a few things.
Customize the Footer
The footer text in WordPress Admin contains links to the Documentation and to WordPress. Let’s change that.
This snippet just prints out some footer text.
function modify_footer_admin () {
  echo 'Created by <a href="http://example.com">Filip</a>.';
  echo 'Powered by<a href="http://WordPress.org">WordPress</a>.';
}

add_filter('admin_footer_text', 'modify_footer_admin');

Change the Logo
This one’s an old trick, but a good one nonetheless. You can change the logo for the login page and the one in the top left located at the WordPress Admin area pages.
The subsequent code snippet just prints out the CSS (that will be printed inside the
<head> tags of Admin pages) that hooks into the div of the logo; it has an ID of #header-logo in the admin pages and it is the h1 > a element for the login page.For the
url property of the style rules, we just feed it the image location of our logo. If the image is inside your WordPress theme’s directory, you can simply use the get_bloginfo('template_directory') template tag to get the relative path to it, followed by the location of the images directory (in this case, it’s called "images") and then the file name of your image (in this case, admin_logo.png and login_logo.png).function custom_logo() {
echo '<style type="text/css">
#header-logo { background-image: url('.get_bloginfo('template_directory').'/images/admin_logo.png) !important; }
</style>';
}
add_action('admin_head', 'custom_logo');
function custom_login_logo() {
echo '<style type="text/css">
h1 a { background-image:url('.get_bloginfo('template_directory').'/images/login_logo.png) !important; }
</style>';
}
add_action('login_head', 'custom_login_logo');
Hide the Upgrade Notice to Recent Versions
There’s no guarantee that your theme will support the next version of WordPress, so to prevent your clients from updating their website, you can ask WordPress to hide this notification.
First, I have to say that this isn’t advisable. WordPress core developers put this notification there for a huge reason: Security updates. But if you must remove it (or modify it), all you have to do is to add a filter for it.
add_filter( 'pre_site_transient_update_core', create_function( '$a', "return null;" ) );
Customize the WYSIWYG Editor’s CSS
If you wanted to customize the appearance of the WYSIWYG editor (maybe to match the theme of your site), you can create a custom stylesheet for it (you can call it something like
editor-style.css) and then study the HTML markup to see how you can hook into the classes and IDs of the editor. Then to add your custom stylesheet, you can use the add_editor_style() function.add_editor_style('css/editor-style.css');
The reason why you’d want to do this instead of modifying the
global.css stylesheet that comes with WordPress is ease of updating the core and modularity. If there’s one major theme to take away in this guide, it’s that you should never modify WordPress core files — there are plenty of ways to hook into them.The Outcome
Using these snippets of code, you can customize and reduce the Admin area’s features down to just the essentials, permitting us to benefit from the advantages of minimalism and reductionism principles in our work.
This is what I’ve been doing, and my clients love that all the clutter that they don’t need isn’t there.
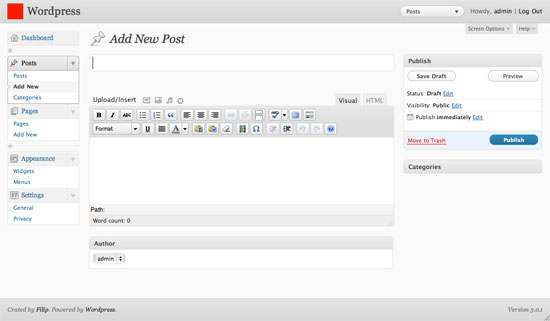
Here’s a final image of my result (for the "Add New Post" page):
-By Parthiv Patel
2 comments:
Parthiv -
My only note is that a good chunk of what you've written about here can be done by changing the screen display options in the "Screen Options" drop down menu in both the admin dashboard and in the post editing screen.
Yes Dear ,
But you not seen that the post was published in 2012...
Earlier version of wordpress there is no functionality for that...!
So basically this post is for those people who running their blog in old wordpress version...!
Post a Comment